Outline Rendering
When an entity was hovered or selected, I overlaid a white color on it, making it pretty difficult to see the material beneath. I survived one year like that. Also, I needed to have outlines for interactive objects in the game, so it was time to add them.
I had multiple constraints as well; respecting the mesh silhouette, being able to merge silhouettes together when more than one is selected, and finally being able to detect which part of the silhouette is occluded, in order to change slightly the color of its outline.
I tried multiple things to get a good result, my first attempt was the “inverted hull” approach where we inflate the mesh by pushing its vertices across the inverted normal axis, then test it against the depth buffer to get what’s left, outlines. The result is far from good, inflating the mesh also dislocates it a bit and the outline width varies depending on the view angle, not great...
For mouse picking, I have an entity IDs pass, so my second attempt was about sampling this texture in a fullscreen pass, and doing some edge detection. Visually it works great, but because the entity IDs texture is filled with per entity values, a single unified shape cannot be reconstructed from it.
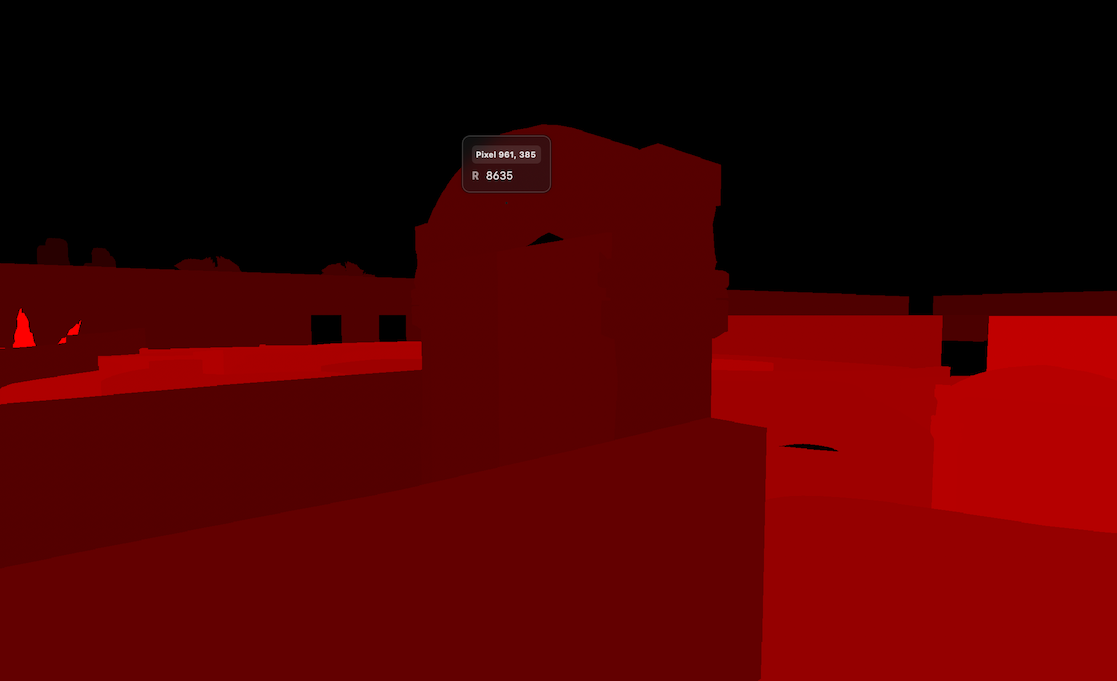 The entity IDs texture. Each entity is assigned a unique ID, visible here as different shades of red.
  Outline edges stop where occlusion occurs, instead of following the full silhouette of the mesh.
 I ended up having two small render passes for outlines, where the first constructs a mask texture which contains the unified shape, and the second one detects and draws edges from it:
For the first pass, I attach a color texture which holds a single hardcoded value. The fragment shader writes this value for all passed fragments, so that I’ll get one unified shape. I also attach a depth texture to fill up, this turned out to be very useful later to get which part of the silhouette is occluded.
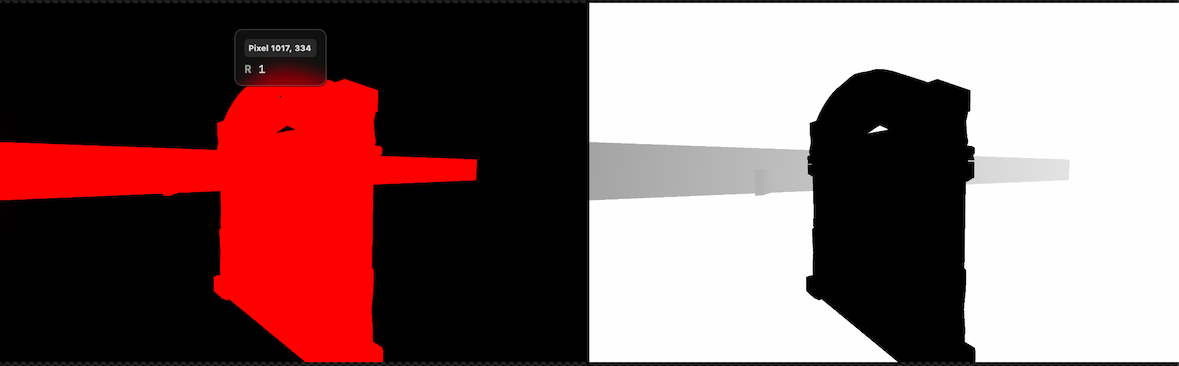 On the left, the mask color texture where we write a single harcoded value (1) for all outlined meshes. And on the right, the associated depth buffer.
 The second pass is a fullscreen render pass where we sample the two textures from our previous mask pass, and the main scene depth texture. In the fragment shader, we simply detect if our fragment is an edge or not by sampling the surrounding pixels (up/down/left/right) and checking if it’s equal or not to our central current fragment value. If not, we’re on the edge, otherwise we discard.
int2 pixel_coord = int2(input.clip_space_position.xy);
int  center      = outlined_mask.Load(int3(pixel_coord, 0));

bool is_edge   = false;
int  thickness = 3;

[unroll] for (int k = 1; k <= thickness; k++) {
    int up    = outlined_mask.Load(int3(pixel_coord + int2( 0, -k), 0));
    int down  = outlined_mask.Load(int3(pixel_coord + int2( 0,  k), 0));
    int left  = outlined_mask.Load(int3(pixel_coord + int2(-k,  0), 0));
    int right = outlined_mask.Load(int3(pixel_coord + int2( k,  0), 0));

    if (center != up || center != down || center != left || center != right) {
        is_edge = true;
        break;
    }
}
Once we know our fragment is the edge, we can return our outline color and stop there, but we won’t see parts that are occluded. For that, we sample the outline mask depth texture, and our main scene depth texture. If our outline depth value is less than or equal to the main scene one, it’s not occluded. We can base our output color on this information!
Some interesting posts on this subjects: